
Download Azure VHDs without your computer!
But how? On my mobile device? No! In a container, using Docker, Linux, Tmux and AzCopy. Come on, I’ll show you how I do it!
The problem
Downloading VHDs from Azure can take a lot of time. Especially if they are several hundred gigabytes (or Terabytes!) in size. VHD stands for Virtual Hard Drive, and is essentially a hard disk for virtual machines in the cloud. Why you need to download them may vary, but legal reasons may be one. And where do you store the files temporarily? Do you have 2-3TB of space available on your laptop? I think not…
Microsoft has a solution called Databox which will let you get a copy large amounts of data both to and from Azure Datacenters. In some cases this can be a good solution. Egress data from Azure also cost money, so it’s something to put into the equation here. Read more on Databox: https://azure.microsoft.com/en-gb/products/databox
So what I do, I use a local NAS to temporary store a VHD file. But this still means that my computer is occupied with this task for hours and taking up precious system resources for that one thing. Hmm… how can I get this task running independently and still have control over the whole download from where I want?
First I tried to use a tool called Storage Explorer. This made me able to log in and browse the VHDs I wanted to download, and I did get to download some disks. The smaller ones. When I tried to download something that took more than an hour, it failed. Why? Because the SAS-token expires by default after 3600 seconds. And there’s no way to adjust this value in Storage Explorer. Damn it!
The solution
I know I can set a custom value for the expiration via PowerShell. And I could use my computer to download the file and all would be well. But then my computer would need to be plugged in and downloading for several hours. I turned to my trusty homelab and began to test some techologies including:
- Proxmox
- Linux
- Tmux
- Docker
- AzCopy
- PowerShell
- TrueNAS with NFS
Quite an intricate setup just to download some files, huh? Yeah, but it solves the problem of both storing the files and freeing up my computer at the same time.
The actual setup
In my homelab I have a host running Proxmox for all of my local workloads. This runs several VMs (Virtual Machines) which again runs different OSes for different purposes. One of them is a Ubuntu Linux VM running several Docker containers. This is not a tutorial on either Linux, Proxmox or Containers. Only a description on how I use them. If you need to learn what a Docker is, please do read up on it and maybe continue to read this article after that?
So why am I rambling on about Linux when Azure and AzCopy are both Microsoft technologies. As it turns out, Microsoft loves Linux. So much they’ve actually made a version of AzCopy for Linux! How neat! And the best part: I can run it in Docker! (Links to all the resources at the bottom of this article).
Therefore I mounted up a NFS share on that Linux VM to my NAS running TrueNAS. Made sure I could both read and write to that share. Then I used PowerShell to create a SAS token for that disk in Azure so it could be exported. Please note that exporting a disk in Azure makes it unusable until either you release it from export manually or the SAS-token expires by itself!
Next was to run the Docker and hope for the best. And, it worked! It ran as it should, downloading the VHD to NAS. And via Tmux I could leave the session, leave the house with my laptop and return some time later and joining the same session and confirming it has finished. Good times.
Wanna know how you can do it too? Sure, I’ll show you
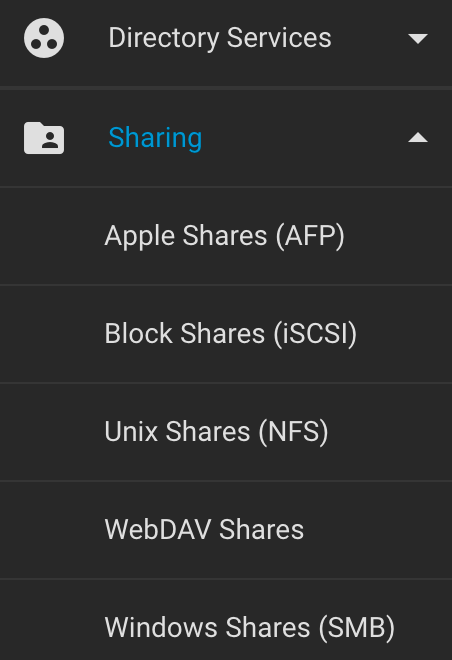
Step 1: TrueNAS
You are not limited to TrueNAS, of cource. But this is my example and you should use what you want.
First i created a NFS share on my NAS:
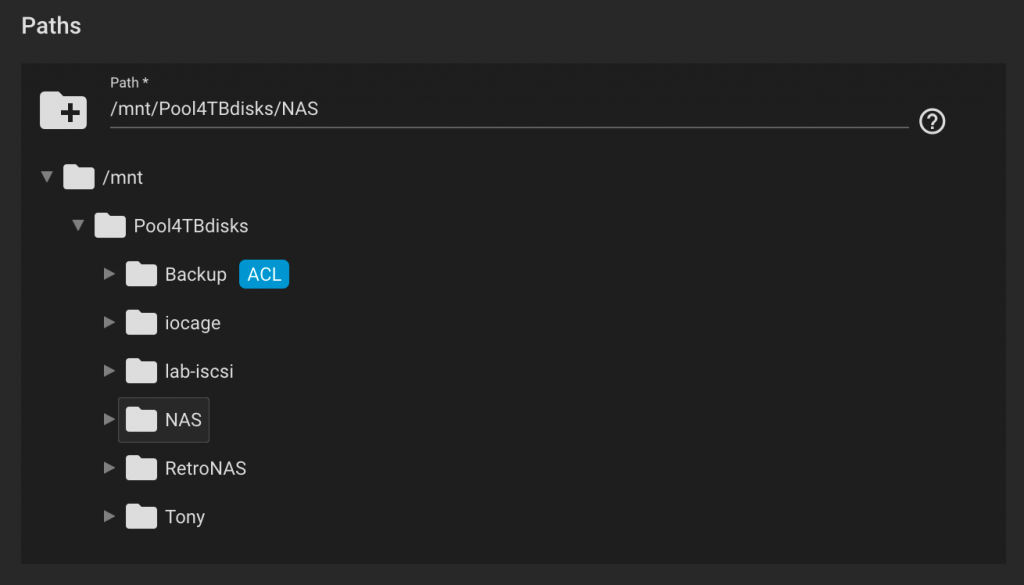
In the file structure on your NAS, choose a sufficient placement:
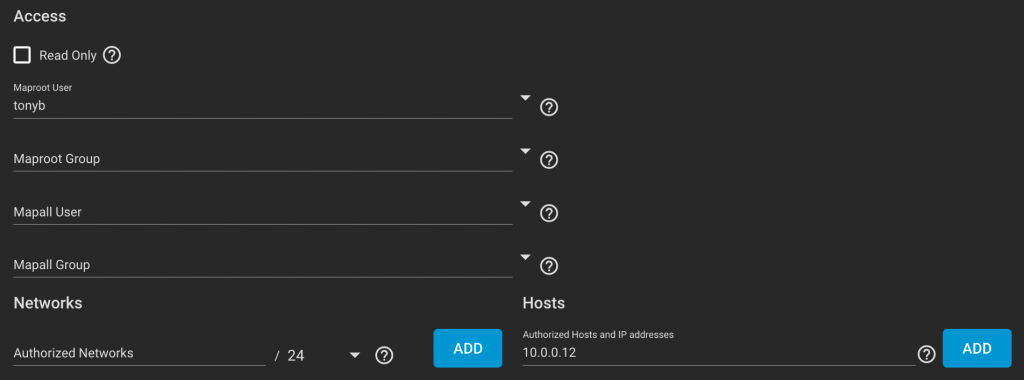
Make sure you set some user rights on this share. And it’s nice to actually limit what machines can acces it, so I set the IP to my VM to be the only machine allowed to communicate with this:
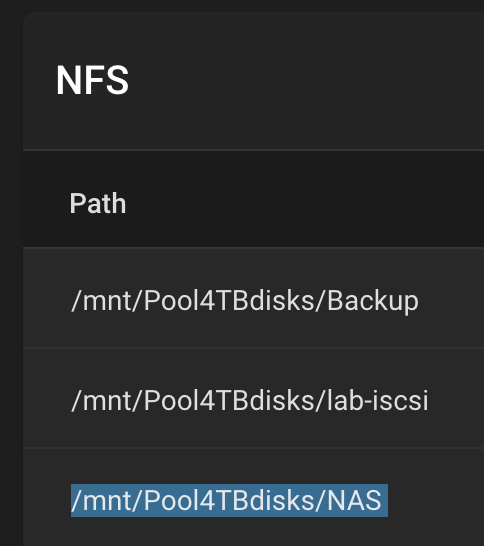
Click «Add» in the top right corner and it should be set. Cool, now you have to copy the path as we need in the next step when we are mounting NFS on Linux:
Step 2: Prepare your Linux environment
Now for some nerdy Linux stuff in the command line! Log into your box and make sure you have NFS-support and Tmux installed:
sudo apt update
sudo apt install nfs-common
sudo apt install tmux
This will make sure both are in place. After that, we want to make a folder to mount our NFS share to. I used this method:
sudo mkdir /mnt/nfs_client
sudo mount -o hard,rsize=1048576,wsize=1048576,timeo=600 10.0.0.204:/mnt/Pool4TBdisks/NAS /mnt/nfs_client/
This first creates a folder under /mnt caled nfs_client. Then it mounts the /mnt/Pool4TBdisks/NAS-share of my NAS, which is on IP 10.0.0.204 to that folder.
Did it Work? Test it!:
cd /mnt/nfs_client
sudo mkdir Testfolder
ls -la
This should output no errors, and show you that a folder with name «Testfolder» exists on the NAS. Good! Now we can move on over to Azure and prepare what we need to download!
Step 3: Prepare Azure
We can use PowerShell for this. Modules needed for this guide:
- Az.Accounts
- Az.Compute
You could also browse the Portal and find the names for the resource group and the disks, but I will show you how to PS it! Connect to Azure:
Connect-AzAccountRemember to authenticate with a user that has the right permissions to the subs and resources you need. If you have more than one Subscription in your tenant, you will get a notification for that. It will use the first one you have access to by default.
In case you have more than one subscription available, get a list over the subscriptions:
Get-AzSubscription

Name                               Id                      TenantId                        State
----                               --                      --------                        -----
Subscription1                      yyyy-yyyy-yyyy-yyyy     aaaa-aaaa-aaaa-aaaa             Enabled
Subscription2                      xxxx-xxxx-xxxx-xxxx     aaaa-aaaa-aaaa-aaaa             Enabled
Subscription3                      zzzz-zzzz-zzzz-zzzz     bbbb-bbbb-bbbb-bbbb             Enabled
If you need to switch subscription, you can do it like this:
Set-AzContext -Subscription "xxxx-xxxx-xxxx-xxxx"Now you want to list out all the disks you have access to. You want to know their name, location, state and size maybe?
Get-AzDisk | ft Name, ResourceGroupName, DiskSizeGB, Location, DiskStateThis gives you a list over disks with their names, Resource Group, their physical location, sizes and even what state it’s in. You cannot download a attached disk (with state attached), so you would need to stop that corresponding VM before you can download.
To list out all VMs, their Resource Group and their state:
Get-Azvm -Status | ft name, ResourceGroupName, PowerStateTo get all disks of a VM, run this:
Get-Azvm -ResourceGroupName "resourceGroup" -Name "vm-name" -Status | ft name, disksThis will then print out the name of the VM and the names for all its disks. So, when you have this information you need to create the export of the disks. If your VM is still running, stop it:
Stop-AzVM -ResourceGroupName "resourceGroup" -Name "vm-name"Now it’s ready to be exported. To do so, use this command:
Grant-AzDiskAccess -ResourceGroupName "resourceGroup" -DiskName "azuredisk" -DurationInSecond 864000 -Access 'Read'Congratulations! You have now given yourself access to that disk, and created an «AccessSAS» to use in the next step. So copy it to somewhere safe and fire up that container. Just make sure it does not contain any strange line shifts or whitespaces. Trust me, it breaks everything!
Step 4a: Run the Docker container from Tmux
Now you have everything you need to start the download. SSH in to your Linux VM and use Tmux to handle the session:
tmux new -n azurediskThis runs Tmux with a new session called ‘azuredisk’. The ‘-n’ argument is the name of the session
Start the Docker image by running a command in this format:
sudo docker run --rm -it -v /mnt/nfs_client:/mnt/nfs_client peterdavehello/azcopy:10.11.0 azcopy copy "Your_SAS_URI" "/mnt/nfs_client/yourvmdisk.vhd"It then should pull the Docker image and soon run AzCopy inside of that. This is an example of AzCopy in action running in Docker:
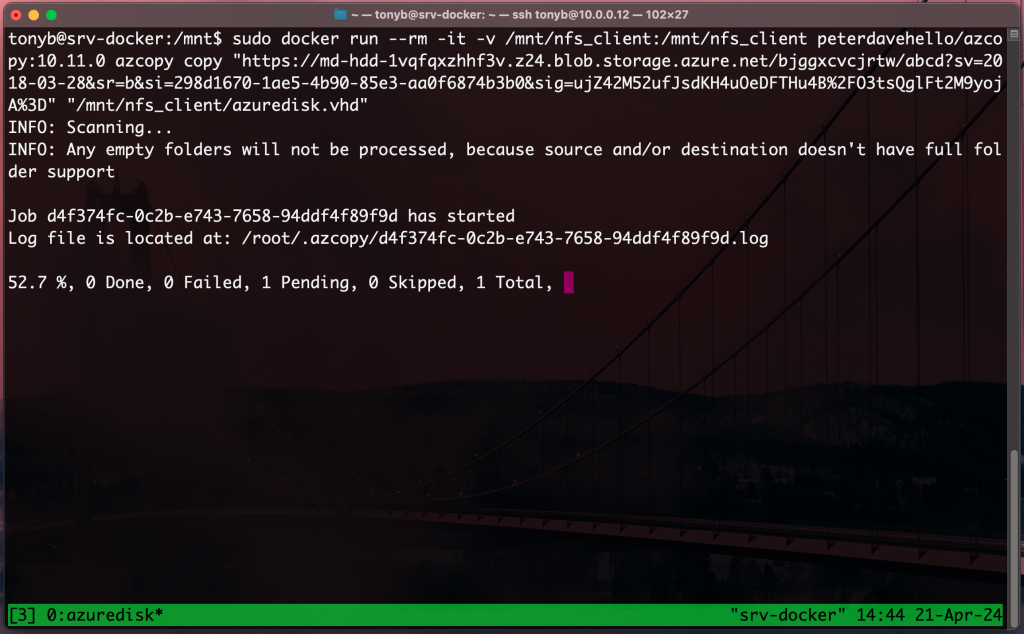
Let me try to explain the Docker syntax I’m using here:
- Docker run runs the docker image directly without any compose-file
- –rm removes the docker instance after it has run
- -it runs the docker in interactive mode. This is the only way you can actually see what’s going on. While It will work with ‘-d’ for detached mode and exit when it finishes, you are left in the dark on how long remains and the overall status
- -v runst Docker in verbose mode
- /mnt/nfs_client:/mnt/nfs_client defines what root directory you work in
- peterdavehello/azcopy:10.11.0 points to the right docker image and specifies what version you want to use
- azcopy copy actually fires up azcopy and the copy-parameter tells it to do a copy. Here you can use AzCopy as you like. Just refer to the documentation for all the other options so you can see what more you can do!
- Your_SAS_URI: This is the AccessSAS you copied from PowerShell earlier
- /mnt/nfs_client/yourvmdisk.vhd is the actual destination. Be sure to name it something meaningful, with the .vhd-extension. If you don’t specify the file name it just defaults to ‘abcd’, and nobody wants that!
Step 4b: Leaving Tmux and joining the session later:
This will potentially run for quite som time now, and it will be a good time to try out Tmux. To detach from a session just press Ctrl + B and then press D (D – without CTRL pressed). You will now return til your shell while Tmux are still handling your session in the background. You can now disconnect from SSH and all will be fine.
So, you had your lunch or whatever and want to check the status on your download. How do you do it? Just SSH in to your Linux box again and run this command to attach your last session:
tmux attachWant to specify which session you want to attach?
tmux attach -t sessionnameChange out ‘sessionname’ with your real session name. Not sure what you called it? Or you have started more than one session?
tmux list-sessionsFor more tips on how to use Tmux, go to: https://tmuxcheatsheet.com/
Step 5: Cleanup
After you have downloaded your files you may have to clean up a couple of things. Perhaps exit the Tmux session?
tmux kill-session -t sessionnameAnd perhaps you want to cancel the «AccessSAS» so you can resume your machine in Azure?
Revoke-AzDiskAccess -ResourceGroupName "resourceGroup" -DiskName "azuredisk"And wait… It can take up to a minute to revoke that access. You will be prompted when it’s complete.
Finally, start that VM again:
Start-AzVm -ResourceGroupName "resourceGroup" -Name "vm-name"Conclusion?
In my case, this solves a problem and I can utilize my homelab even more! Love it when I can leverage several layers of technology to solve some troubles and at the same time make my life easier.
Do you have a homelab? Do you have solved this in another way? Please write to me about it. Would like to learn of more ways to use my homelab.
Links
- Tmux Cheatsheet: https://tmuxcheatsheet.com/
- Proxmox: https://proxmox.com/en/about/company
- Ubuntu Linux: https://ubuntu.com/download/server
- Tmux: https://github.com/tmux/tmux/wiki
- Docker: https://www.docker.com/
- AzCopy: https://learn.microsoft.com/en-us/azure/storage/common/storage-use-azcopy-v10#download-azcopy
- AzCopy in Docker: https://github.com/PeterDaveHello/docker-azcopy
- TrueNAS: https://www.truenas.com/truenas-core/